Shaping Freedom: Moving Between Carved Volume, Layered Mass, and Patterned Surfaces
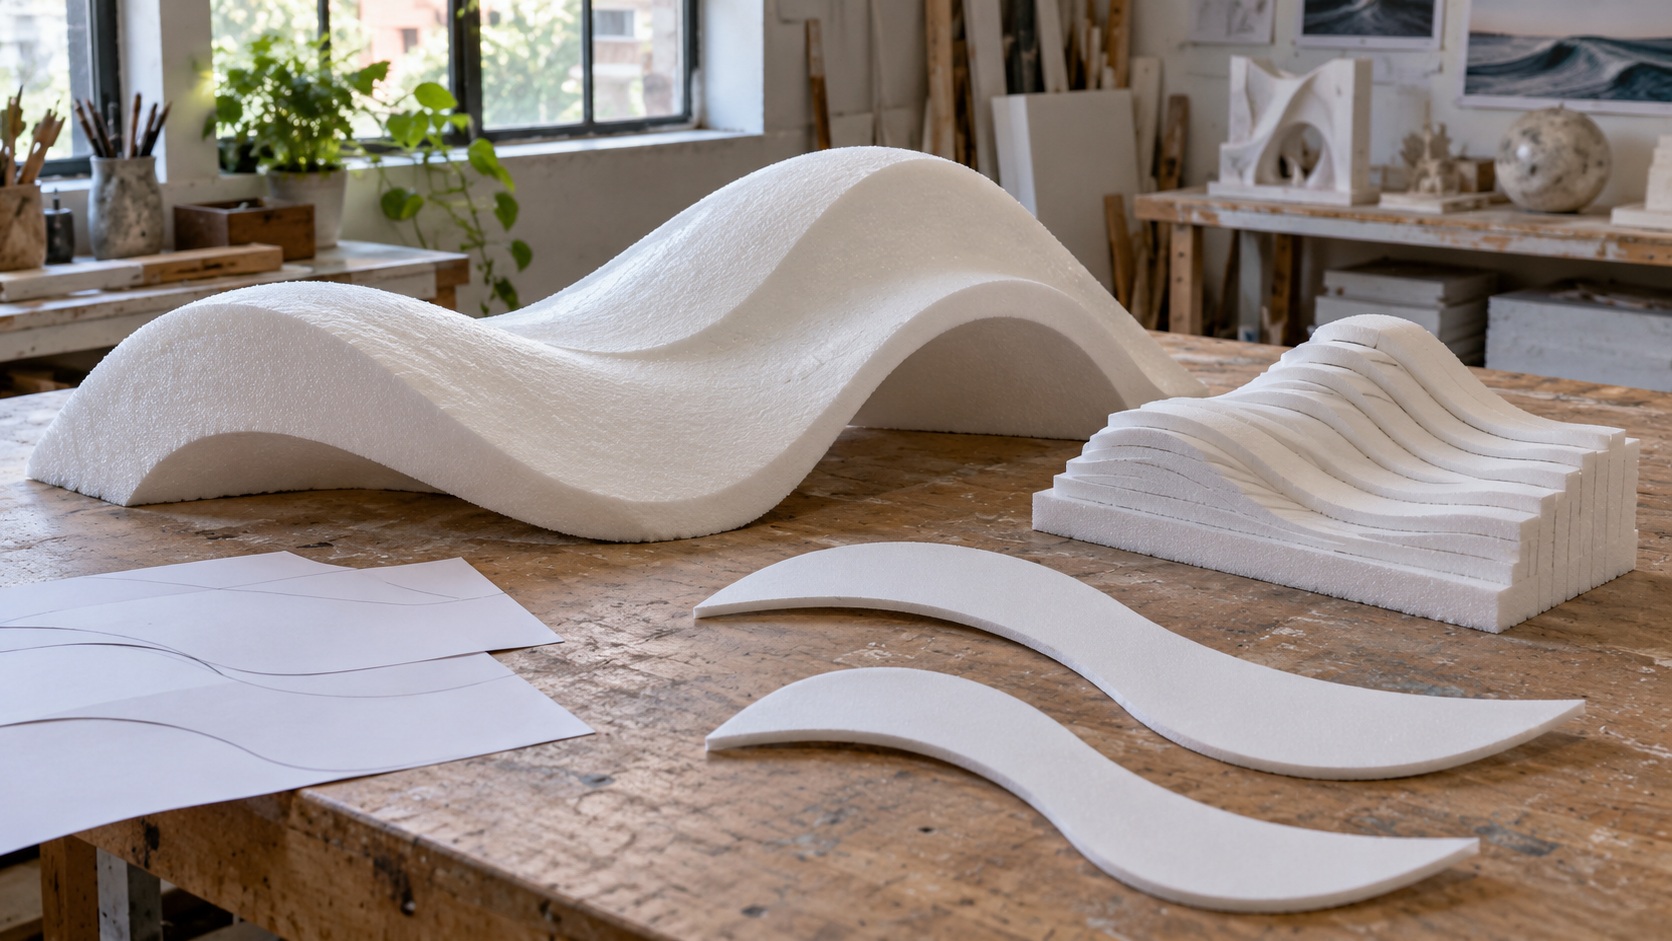
Artists sometimes call foam flexible when they mean it is forgiving to shape. A rigid block may not bend at all, yet it can still let a sculptor test a broad curve, remove an awkward mass, or rebuild a silhouette in an afternoon. Flexible sheet foam offers a different freedom: it can wrap, fold, or follow a form, depending on its particular grade. Separating these meanings helps an artist choose a useful starting material. The creative advantage lies in how quickly a thought can become a physical decision, not in an assumption that every foam behaves alike. When removal, layering, and assembly are planned together, foam can turn an intimidating large object into a sequence of manageable experiments. Imagine developing an oversized curling ribbon for an exhibition. A block study lets you search for its silhouette, but cutting the entire ribbon from a solid billet may leave substantial waste and awkward access to the inner curve. A sheet mockup can instead reveal a practical segmented shell. The carved study still has value: it establishes the gesture that the patterned construction must preserve. Moving between these methods is a creative advantage of a material available in different forms. The artist is not confined to one technique simply because the first sketch suggested it. Comparing two physical studies can clarify whether a surface should feel heavy, inflated, folded, or flowing. Physical studies also let collaborators discuss the same contour without interpreting separate sketches. Those distinctions are harder to judge from a material label than from an actual object in light and space.
A: Not here necessarily; shaping freedom and mechanical bendability are different properties.
A: It preserves room to adjust uncertain proportions after viewing the whole form.
A: Layered contours or patterned shells can work, depending on the desired geometry.
A: The foam's thickness changes overlaps and the space needed at corners.
A: No. Deliberate seam placement can reinforce the design's panel or contour rhythm.
A: A compatible addition may restore volume, but assess the whole form before patching.
A: Build a full-size demanding fragment to test reach, junctions, and finish behavior.
A: It shows the stock's original texture, edge response, and useful detail scale.
A: Only after confirming the exact product and its manufacturer's processing guidance.
A: Fast shaping enables iteration; it does not settle proportion or surface choices automatically.
Work Out the Gesture Before the Texture
A large block offers enough volume to search for a form, but that freedom can encourage premature detail. Establish the main gesture first: the direction of a torso, the sweep of a wave, or the balance between an enclosing mass and an opening. Mark a few reference planes, then remove material in stages. Leaving extra stock around uncertain regions preserves options while the overall composition becomes legible. Small cuts are easier to evaluate than one confident removal that commits the entire silhouette.
Look from more than the favored viewpoint. Rotate a manageable piece on a suitable support, or walk around a larger one. A curve that reads elegantly from the front may flatten at an oblique angle. Strong side lighting reveals abrupt changes in curvature that diffuse studio light can hide. The value of easy shaping is that you can respond immediately to those discoveries. Keep the evaluation tied to the physical form instead of trying to solve every three-dimensional problem through another drawing.
Match the Stock to the Kind of Decision
Rigid foams suit subtractive exploration of solid masses. Expanded bead structures can give a different carving texture from finer, more uniform boards. Flexible cellular sheets suit folded surfaces, padded forms, or pieces assembled over a support. Resilient foam that rebounds after compression is not automatically easy to carve into a crisp face. Likewise, a board that takes a clean contour is not necessarily appropriate for repeated flexing. Start with the manipulation the artwork needs, then compare materials.
Try a short study with the actual stock before purchasing a whole installation’s worth. Shape a concave transition, a narrow edge, and a shallow relief. Observe whether the material tears, compresses ahead of the tool, reveals a distracting cell pattern, or resists the intended finish. The point is not to rank all foams from best to worst. It is to learn which behavior supports the specific vocabulary of the piece.
Thickness can be as important as polymer family. A thin sheet may follow a gentle cylinder yet resist a compound curve without darts, seams, or segmented construction. A thick block may be excellent for a rounded volume but wasteful for a broad hollow shell. Sketch the relationship between the final surface and the starting stock. That sketch often suggests a different assembly method before the artist invests hours removing material that never needed to be there.
Keep the first successful material study as a reference rather than immediately painting over it. It records the edge quality, tool marks, and minimum practical detail of the chosen stock. Later decisions about coatings can be compared against that reference. If a finish fills the texture that attracted you to the material, the study makes the loss obvious while there is still time to change the surface approach.
Layering Turns a Block Into a Plan
Laminating sheets can reduce the need for an enormous starting billet. Draw sections through the proposed form and organize layers around its main dimensions. Each layer becomes a rough contour that can be assembled and refined. Registration marks help maintain alignment, while temporary reference faces preserve a way to measure the developing volume. The method is especially useful when a design has a broad profile but changes gradually through its depth.
Seam placement influences the shaping experience. A seam across a delicate edge may become difficult to hide or may respond differently from the surrounding stock. A seam buried in a broad mass can be easier to manage. Choose an adhesive system approved for the actual foam, and respect its assembly and curing instructions. Evaluate an expendable bonded sample before carving across the join. Easy cutting should not be mistaken for evidence that every adhesive is compatible.
Layering also creates an opportunity to build cavities, removable sections, or internal access while the assembly is open. Photograph these features before closing them. A hollow region may reduce material use and make a large work easier to move, but it changes where support is needed. Decide how the work will stand and be handled before removing stock that might otherwise distribute those forces. For structural or suspended elements, involve an appropriately qualified designer.
Use Offcuts to Keep the Conversation Open
Subtractive work can feel irreversible, but foam permits some forms of revision through approved additions and rebuilt sections. Save useful clean offcuts with the project rather than treating every removed piece as immediate waste. A matching wedge can restore a cheek plane or extend a curve after a compositional change. These are deliberate construction operations, not an invitation to glue every mistake indefinitely. Too many patches can make the surface response uneven and complicate later finishing.
Before adding material, ask whether the change improves the whole form or simply avoids abandoning a local detail. Take a photograph from the intended viewing position and compare the proposed addition with the larger silhouette. Temporary paper profiles or unbonded stand-ins can help evaluate an extension without committing to it. The ease of modification is most useful when it encourages honest comparison, not when it allows a weak passage to accumulate layers of reluctant correction.
Sheet Forms Need Their Own Vocabulary
When the design depends on curved surfaces rather than carved volume, work with patterns. Paper or inexpensive card can reveal where a flat shape needs a dart to become a three-dimensional shell. Transfer the refined pattern to a suitable foam sheet, accounting for thickness at overlapping edges. A pattern that closes perfectly in paper may bind when made from thicker stock. Test a representative junction before cutting all the final panels.
Compound curvature can be built through segments rather than forced into one uninterrupted sheet. Think of the seams as a design resource: they can follow contour changes, suggest panel divisions, or create a deliberate rhythm. If the seams must disappear, allow enough room for the chosen bonding and finishing method. Stretching a material beyond its intended behavior can create springback or distorted edges that remain difficult to correct even after the surface is coated.
Mechanical shaping at room temperature may be sufficient for a particular stock and curve. Do not introduce heat merely because another maker used it on an unidentified foam. Consult the manufacturer’s processing guidance for the exact product before considering thermal methods. Unknown packaging scraps and mixed laminates are poor candidates for experiments involving heat or solvents. A cold-patterned alternative often makes the shaping process more predictable while keeping material identification straightforward.
Pay attention to how the form relaxes after temporary restraint is removed. A sheet held in a jig can appear settled while still exerting force on its seams or supports. Let a trial assembly stand in its intended configuration and examine the edges again. If the shape depends on continuous restraint, that restraint belongs in the final design. It should not be silently transferred to a decorative coating that was never intended to hold the geometry.
Tool Choice Changes the Surface Language
A fine tool is not always the right tool for early work. Broad removal establishes planes; progressively smaller tools refine transitions and details. Select cutting and shaping equipment appropriate to the identified material and follow its instructions. Control chips and dust at the task, keep the work stable, and choose protection through the product information and workplace assessment. The U.S. Consumer Product Safety Commission’s Art and Craft Safety Guide is a useful starting point for evaluating art processes rather than assuming a familiar material makes every operation harmless.
Tool marks can be retained as part of the expression or reduced for a more continuous surface. Make that choice deliberately. A heavily smoothed finish may erase a lively carved passage, while an uncontrolled tear can look accidental next to a carefully modeled region. Examine the work under the final lighting and at the final scale. Surface decisions that appear subtle at arm’s length may become the dominant visual signal on a large illuminated installation.
Scale Up Through Evidence
A successful small study does not automatically solve a full-size sculpture. Enlarging a form changes the length of unsupported regions, the visibility of seams, the amount of finish, and the difficulty of reaching the surface. Build a full-size fragment of the most demanding detail before committing to the complete object. A shoulder transition, a deep recess, or a folded corner may teach more than a uniformly enlarged miniature.
Use templates and measured reference points without letting them replace observation. Templates preserve consistency between related sections, particularly where a sculpture is assembled from modules. But the finished volume still needs visual judgment. Slight differences in stock alignment or shaping can accumulate into a contour that is technically close to the drawing and visually awkward. Step back regularly and evaluate the assembled work whenever its size and handling arrangement permit.
Reserve time for this evaluation in the schedule. Foam’s reputation for speed can lead clients to expect the first carved version to be the final version. Explain that fast material removal creates room for iteration; it does not eliminate the need to judge proportion, refine transitions, and test finish. A disciplined sequence of rough form, review, refinement, and surface study uses the material’s advantages more effectively than racing directly toward detail.
Let the Process Serve the Form
Choose foam for the decisions it makes possible: quick volume studies, layered construction, adaptable patterns, and responsive revision. Keep its actual behavior visible in the process, and let the artwork determine when another material is needed.